Thursday, April 7, 2016

Visit to Deason Innovation Gym

Today we visited the Deason Innovation Gym (DIG), in the basement of one of SMU's engineering buildings, Caruth Hall. While we were there, we went through orientation and training for how to use the 3D printer. 


The DIG is a unique space for students to come and create whatever they want (within reason). They have laser cutters, power tools, vinyl cutters, and 3D printers. 


We were only trained on the 3D printer today, and in the future we hope to use it to print some miniature vessels from the models Dr. Selden created in February.


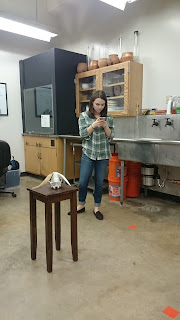
One of the DIG 3D Prtiners

There are 3 steps to using a 3D printer: design, slice, and print! We learned how to use different programs to do these things on a computer connected to the printer.


Afterwards, our instructor printed an example project. It was tiny, so it only took about 3 minutes to print. He said that the longest project printed at the DIG took about 12 hours! It was an Eiffel Tower, and was a little shorter than 1 ft.

Some other 3D projects we saw while at the DIG:


Soon we will be going back to the DIG to show that we are competent and confident in using the programs and printer. Then, we will be free to use the printer whenever we want! To learn more about the DIG, check out their website.

Tuesday, April 5, 2016

Hamilton and Marr Event

On March 28th, we attended the Hamilton and Marr Scholars Event! The event showcased researched projects done by the Hamilton and Marr Scholars. These scholars are students who received funding for research from the Jack and Jane Hamilton Undergraduate Research Scholarship and Dr. Ray H. Marr Undergraduate Research Scholarship. 

We are Marr Scholars, and are graciously funded by the Dr. Ray H. Marr Undergraduate Research Scholarship through the Institute for the Study of Earth and Man. The scholarship has made our research on exploring the uses of 3D Archaeology possible. Unfortunately, Christine was not feeling well, and was unable to attend the event. We missed you!

Dr. Ray H. Marr and the Marr Scholars

During the event, some of the scholars prepared posters about their research projects, and others gave presentations. The subjects of these research projects ranged from anthropology to chemistry to economics, and other departments within the Dedman College of Humanities and Sciences here at SMU. We had a wonderful time at the event, and it was very interesting seeing all the amazing projects that other undergraduate are students working on!

Thank you again to both Dr. Ray H. Marr and the Hamilton Family for making all of this possible!

Left to right: Dr. Eiselt, Sam, Lauren

Friday, March 18, 2016

Dino-Lite Photos

Since Dr. Selden's visit, he has completed the 3D models of the vessels, and has begun publishing them on Sketchfab. They are also being posted on the Caddo Nation Heritage Museum Facebook Page, which has new 3D models of Caddo vessels posted everyday.

Click the play button to interact with the model.


While he's been completing the models, we began using a Dino-Lite to take microscopic photos of different sections of the vessels that Dr. Selden scanned.

We set up using a boom stand, which holds the Dino-Lite steady in place. Underneath it, we placed a foam sheet where the vessels would be in order to add padding, and protect them from the surface of the table. Sometimes, if the vessel is too small for the Dino-Lite to capture a good angle, we would place a book underneath the vessel to raise it.

And then we were ready to begin taking pictures!

 After focusing the Dino-Lite, we took pictures of cross sections, incisions or punctations, and the surface of the vessels.

 The cross section of an area of the vessel, usually the rim, that has been broken. This allows you to see the temper of the vessel.

Incisions and punctations are decorative elements made on the surface of a vessel. Incisions are engravings made by cutting or scrapping the surface, while punctations are impressions made in the clay using either a tool or finger.

Incising example:

Punctate example:


We took multiple pictures of each element at different angles of light, because it creates more dimensions, which makes for a more accurate image of the vessel.

 After all the pictures are captured, we saved them all and moved on to the next vessel.

Next, we will begin experimenting with trying to use the Dino-Lite to create microscopic 3D models!

Friday, March 4, 2016

3D Scanning Workshop Day 2

Earlier this month, on Saturday February 6th, we continued learning about 3D scanning and modeling from Dr. Selden. One of the projects we focused on that day was using photogrammetry to create 3D models. To do this, we went the Daniels Family Cemetery, a private cemetery in Dallas, which the Daniels Family allowed us to visit. While there, we took photos of two Woodmen of the World grave markers.
 Dr. Selden explained to us that these markers were provided by the insurance company Woodmen of the World Insurance, operated through WoodmenLife, upon the death of a customer. 

Before we could begin, Dr. Seldon explained to us how to take photos for a 3D model. Here is a photo that shows Dr. Selden demonstrating how to take photos of one of the grave markers.

The method we used at the cemetery is very similar to the way we took photos of Rachel's Pet when we were first experimenting with Autodesk 123D Catch, which we have discussed in a previous blog post. We began by standing in front of the marker, and then slowly walking around it in a circle, making sure to take one photo for each step. When we completed the circle, we had about 20 photos of the marker. 

Here is a photo of Sam and I holding down grass that had grown around the base of a marker, while Christine takes photos using this method.

After this, we had to take photos at a higher angle in order to capture the top of the marker. Without this step, the 3D model would have had a hole at the top. Here is Dr. Selden showing Christine how to take photos at a higher angle. 

The last step is to take detail shots of the marker. This step was very simple, and only required a few photos of the Woodmen of the World emblem, and some other shots of the branches on the marker. This made the details of the 3D model clearer than they would have been if we had just used the photos from the first two steps.

After that final step, we headed back to the lab to stitch together all of our photos and create the 3D model! But first, Dr. Selden took a selfie.
From left to right: Dr. Selden (foreground), Rachel, Lauren, Sam, Chrisitne, and Dr. Eiselt (background)

When we got back to the lab, we used a program called Autodesk 123D Catch, the same program we used to create the model of Rachel's Pet, to stitch the photos together and create the model. It is a free, easy to use program that you can download here

While we do not have the 3D models of the grave markers that we took photos of, you can see examples of other models of Woodmen of the World markers here on Dr. Selden's blog, crhr:archaeology. If you want to learn more about photogrammetry or Autodesk 123D Catch, you can read this article, also on Dr. Selden's blog. 

Friday, February 5, 2016

3D Scanning Workshop Day 1

Today was an exciting day at the lab! Some graduate students came in and we started trying out one of the scanners under the direction of Dr. Selden. We used the handheld Creaform, the same scanner that Rachel learned how to use yesterday.

Here is Dr. Selden teaching graduate student Ryan Breslawski to scan with the Creaform.

Rachel also used the NextEngine Desktop scanner to make a 3D model for her dissertation. It is a flute made from an eagle ulna.

 We also used a Dino-Lite, a portable digital microscope that takes high-resolution pictures, to photograph surfaces, cross sections, designs, and erosion of some of the vessels.


We are excited to continue the project tomorrow! We will be visiting the Daniel Family Cemetery to make some 3D models using photogrammetry, and then coming back to the lab to learn to use the rest of the scanners. 


Thursday, February 4, 2016

Welcome Dr. Selden

Today, Dr. Selden came to SMU from Stephen F. Austin University to teach us how to use several different scanners to make 3D models of vessels. Dr. Selden demonstrated how to use the Vivid 9i, NextEngine Desktop 3D Scanner, and taught Rachel how to use the Creaform. Most of the day we were observing how to use the machines, and tomorrow we will begin using them ourselves.


This is the Vivid 9i scanner. It's scanning a Ledger Art Vessel by OHET. TolhT. Kiowa, belonging to the Darling Family, and is provided by James Andrew Darling. Darling received it from his great great grandmother, Sarah Darling, who was a teacher at the Hampton Institute in the 1890s. This is real Ledger Art painted onto a factory made ceramic vessel. These items are very rare, and are interesting from the perspective of Ledger Art history.


The NextEngine Desktop 3D scanner is using lasers to create a 3D model of a Micaceous clay pot sculpted by Felipe Ortega. Check out his website to see more of his pottery.


Here is Dr. Selden teaching Rachel to use the Creaform. It's a handheld scanner, and scans 500,000 points per second. It is most effective for capturing textured objects, but makes really large files.


Tomorrow we will learn more in depth about the scanners and get to use them ourselves.


Friday, January 29, 2016

Experimenting with 123D Catch


Today we started learning how to use 123D Catch! It is a program used to create a 3D models out of photos taken with any camera.

This is a first draft of our initial attempt at a 3D model. To view the model, click on the 3D option on the bottom left. Be aware the it will show the image upside down. Click and drag the image to look at all angles of the goat skull (and Dr. Eiselt's lab). If you're still having trouble seeing the model, you can try switching browsers.

We started using a goat's skull, who will from now on be known as Rachel's Pet (Rachel loves goats).

Then we each took 30-40 pictures to capture every angle of Rachel's Pet. 
    

We used sticky notes to mark a consistent distance from the table.
Then, using the 123D Catch app on our phones, which uses photogrammetry
to stitch together the photos, we processed the images and created our own 3D model.

Creating the model was surprisingly easy, although it took a while to process all the images on the app. To learn more about the app and how to do this yourself, visit the 123D Website.

We wanted to experience a simplified process of creating a 3D model to prepare ourselves for the more complicated process we will learn in February using laser scanners instead of photogrammertry.

To learn more about photogrammetry, check out this great article on Robert Z. Selden's blog crhr:archaeology.

Stay tuned for an edited version of this model of Rachel's Pet!


Welcome to 3D Archaeology @ SMU!

We are Christine Nestleroth, Sam Schwartz, and Lauren King, Undergraduate Research Assistants in the Material Sciences Lab of the Anthropology Department at Southern Methodist University, working under Ph.D. Candidate Rachel Burger and Dr. Sunday Eiselt. This semester we will undertake a digital heritage preservation project, utilizing prehistoric vessels from Texas as part of a larger digital heritage preservation initiative. Funding is graciously provided by the Marr Undergraduate Research Scholarship through the Institute for the Study of Earth and Man.

The purpose of this project is to preserve vessels in the SMU collections as 3D representations that can be employed in a variety of analyses subsequent to repatriation, make data publicly available for the benefit of the community and use in future research, and to explore the capacity of 3D scanning to inform upon a quantitative analysis of variation in ceramic shape and form.